|
“Counterpoint” is the relationship between 2 or more musical lines. (or voices) This is commonly seen in classical music, particularly in the Baroque period.
I teach this approach to my students that are at or near the intermediate level. The type of counterpoint I teach is one in which you juxtapose a melody above bass/root notes. Here are the steps:
After composing a dozen or so of these arrangements, you will find that the whole process will become much easier and it will unlock the fretboard greatly. This is perhaps the most “musical” way to approach learning on the guitar because it forces you to wrestle with the 2 most primary aspects present in a song - the melody and the bass notes of the harmony. It's also very satisfying and fun to play once you begin to see some results! Dusty Wings: This catchy little pop song is the first track on the first studio album I played on back in 2002. I'm using my G&L, 5 string bass on the track. In this blog I'm going to lay out an overarching/holistic approach to putting the puzzle that is music together! Excelling at music requires you to synthesize all of the composite aspects of playing together to create your unique self on your instrument. I'll lay out and briefly describe what I consider are the 12 most salient areas of musicality. In the broadest sense, music consists of 4 main parts: rhythm, harmony, melody and tone/timbre. This blog will go much deeper in exploring those fundamentals...
1. Ear training: absolutely essential for musicians - the better your ear, the easier it will be to figure out songs, solos etc. and compose your own music. Suggestion: sing the notes you're playing in real time, this will help a lot, will get you synced with your instrument and is fun! 2. Rhythm: the best players also have the best rhythm, whether it's in their background chording, soloing or melodies. Rhythm is so important that I think it's fair to say that without it, there is no music! Suggestion: play with metronome/drum beats often. 3. Endurance: an often overlooked aspect of playing an instrument, that is, until you get in a band and realize you can't come close to keeping up! Suggestion: play along with songs/jam tracks for the ENTIRE duration of the piece! (this is also a great warm-up exercise) 4. Strength: closely associated with endurance in that, as one goes up the other, to varying degrees, the other rides it's coat-tails. Suggestion: on guitar, play lots of barre chords and on bass, play chords. 5. Pure Improvisation: by this, I mean soloing over a progression that has no pre-planning whatsoever. You put on a jam track/etc. and just play. Like a great conversationalist, who knows that they call speak in an interesting and meaningful way in any situation, great soloists get to that point by studying their craft in myriad ways. Suggestion: Put a jam track on and solo over the entire form in a static position then on the next round through the progression move up to the next position and repeat... 6. Compose solos: This is something almost all of the greats often do, whether it's Brian May, David Gilmour or Alex Lifeson. When you compose a solo, you work on it piece by piece, editing, changing and rearranging as you go. This will help your pure improvisation too! Suggestion: try and add many different techniques while composing solos and also try and get creative with the rhythm. 7. Copy solos: Learning solos "note for note" is very good ear training and will also give you an indirect route into crucial music theory as used by the greats! Additionally, it's extremely fun when you can really lock-in and play along with a solo in perfect unison. Suggestion: start with simpler solos and really try and recreate all the nuances. 8. Copy guitar/bass parts: many musicians focus on learning the chord structures and solos of songs while ignoring the interior parts of the songs. This is also great ear training and can be very difficult because it's harder to hear the interior parts and they're often buried in the mix. Suggestion: work on learning parts that you really love! 9. Compose guitar/bass parts: doing this will help your overall musicality. Coming up with additional parts that both compliment and enhance the song is really an art form! Suggestion: with your looper pedal or recording equipment/software, whatever you record, always lay down at least one additional part and eventually, you'll get good at it and everybody wins! 10. Music theory: This area is so vast, you could spend the rest of your life analyzing it! However, realistically speaking, the beauty of music theory is that every time you learn some new aspect of it, you can immediately incorporate it into your playing. Then, when you've used it enough, it will become a part of your "musical personality". Suggestion: when you pick up a new piece of music theory, try and use it over and over again in things you already play. For example, if you learn about chord substitutions, try adding a new section to a progression you typically play but that uses the new substitution idea in it. 11. Hand synchronization: getting your right and left hands operating in perfect unison is essential and challenging. Anything you play can move you in the right direction here provided it's played slowly and deliberately (and preferably, using a metronome/drum beat) Suggestion: work on playing scales, arpeggios and exercises using string skipping, it's extremely effective, fun and sounds amazing! 12. Right and left hand techniques: Like music theory, this area is so vast, it's inexhaustible! If variety is the "spice of life", the musical equivalent is technique. Generally, the best, most innovative and interesting players use many different techniques in their playing. Suggestion: particularly when soloing/composing solos, remind yourself to try and incorporate at least one more technique than you would typically use. I got my looper pedal a few years ago and I can say with no reservations that it is one of the best tools there is for improving your playing!
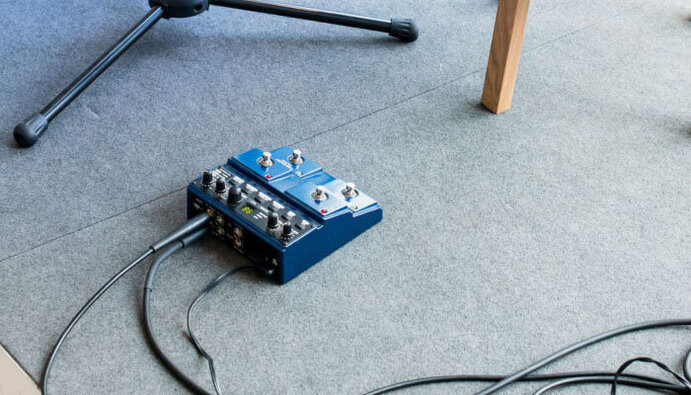
I'm going to explain 3 fundamental applications for the looper pedal... The first application is going to be playing a static chord into your looper then playing different scales/arpeggios over it. This is great ear training and really fun. It can be pretty challenging to get what I call a static, perpetual loop recorded. If it's done well, this will result in a measure or two repeating seamlessly ad infinitum. To achieve this, count 2 or 3 measures in time to firmly establish your tempo before activating your looper pedal. You have to be super precise to get this just right and there will almost certainly be a learning curve. Once you're reasonably good at this, I suggest recording an A5 chord consisting of the 5th string open, 4th string 2nd fret, 3rd string 2nd fret, second string 5th fret and first string 5th fret. Next as that A5 chord is endlessly looping, I'm going to have you play several scales/modes and arpeggios over it. Here they are, play all of them rooted on the A on the 6th string fret 5: A ionian, A dorian, A phrygian, A lydian, A mixolydian, A aeolian, A locrain, A major blues, A minor blues, A major 7 arpeggio, A minor 7 arpeggio and A7 arpeggio. Record a static A7 chord onto looper and play A major and minor blues scales over it and the following arpeggios: A7, A9, A11, A13 and Am7. Also play the dorian, mixolydian and diminished scales. Record a static A chord and play the follow over it: A major, lydian, mixolydian and major blues scales and Amaj7 and A7 arpeggios. Second, you can record what I call a “back to back chord progression”. This is when you play a chord progression that repeats as soon as it ends. A couple of favorites of mine to do with students are: 12 bar blues and some common 4 chord progressions. (for example: I – iii – IV – V or I – vi – ii – V) You can experiment with playing different scales and arpeggios over the progression. Also, take the same approach and apply it to a 12 bar blues. Finally, you can use the looper pedal to become more proficient at another instrument. For example, if you're primarily a guitarist, add a bass track to all of your loops to get more practice at playing and thinking like a bass player and do the reverse if you're mainly a bassist. One bonus piece of advice: when recording on your looper, don't use a metronome/drum beat/click track. You can use your time with the looper to also work on your ability to maintain a steady tempo which is actually much harder than most people realize and vitally important! .This blog is going to have information that you can immediately use to plug in and play progressions using harmonic minor (and mixing it with natural minor)...
First off, here are the 4-part harmony versions of the harmonic minor chords: i = minor/maj7 ii = half dim 7 III = maj7#5 iv = min7 V = 7th VI = maj7 and VII = dim7 These chords in A harmonic minor are: Am/maj7 – Bm7flat5 – Cmaj7#5 – Dm7 – E7 – Fmaj7 – G#dim7 Next, I'll show you 4 common and interesting harmonic minor chord progressions then one progressions that mixes between harmonic and natural minor:
Am7 – G#dim 7 – E7/G# - Am – F#7 – Bm – F – G7 - E7 |
AuthorEric Hankinson Archives
December 2023
Categories
All
|
|
The Chromatic Watch Company
(my other business) |
|


 RSS Feed

